In this guide · 6 sections
- Start with the actual set
- Choose the job before choosing the board
- Calculate clear cells, then confirm the actual fit
- Sample the packing sequence and the complete shipper
- Prepare a useful supplier brief
- Sources
83 / Cosmetic Packaging
Quick answer
A cosmetic gift box divider separates the items in a set, but it does not automatically hold a bottle or protect a jar in transit. Start with the actual packed products, choose the support each item needs, then review the divider and outer box together on a physical sample.
 By Hugo He · Custom Packaging Consultant, MTT Packaging · Updated 2026-11-11

At a glance
Plan paperboard dividers for a cosmetic gift box: product measurements, cell sizes, removal access, sampling and a quote checklist.
List every jar, bottle, cap, carton and card included in one set. Measure the widest point and finished height with closures fitted; record filled weights and surfaces that must not rub. Arrange items in the intended opening orientation before setting the box size. A jar and a tall pump can need different support heights.
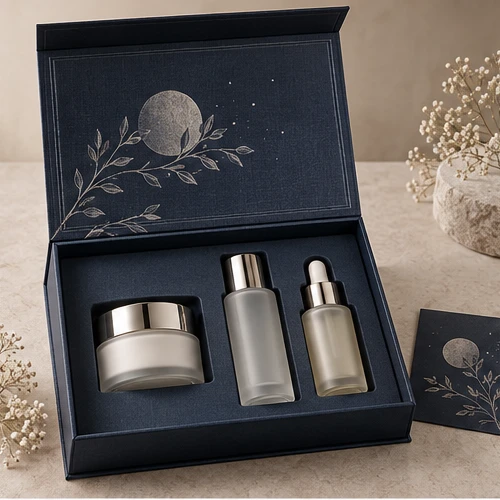
The skincare ritual gift-box design shows separate positions for a jar and serum. It is a visual reference for organising a set; the pictured insert is not evidence of a divider specification or transit test.
| Option | Useful question | Check on sample |
|---|---|---|
| Interlocking partitions | Do items need separate cells? | Joint stability, cell clearance and pack-out sequence |
| Folded paperboard platform | Does the item need a defined visible position? | Support underneath, finger access and board deflection |
| Shaped insert | Does the item need support around a particular shape? | Contact points, surface marking and insertion force |
The right combination depends on item geometry, weight, finish and distribution. Compare custom insert options and ask for a sample suited to your set.
As an illustrative calculation, three cells with clear widths of 55 mm, 45 mm and 35 mm separated by two 1 mm dividers require 137 mm inside width: 55 + 45 + 35 + 1 + 1. This excludes perimeter walls and clearance for assembly, product variation and wrapping. It is not a production tolerance or an MTT quotation.
Define which measurements are clear internal dimensions and which include board thickness. Allow space for caps and finger access; ask the supplier to review slots, board caliper and the final cutting layout. Confirm dimensions and retention with actual filled products rather than relying on nominal bottle volume.
Load the heaviest item, close and reopen the box, and check whether partitions remain seated and each item can be removed without pulling a pump or decorative cap. Inspect sensitive surfaces for rub. Agree the sample type, sample charges and approval record before production.
For parcel shipments, review an outer shipping box and cushioning separately. FedEx recommends individual cushioning for fragile items and a protective outer box for gift boxes; the applicable packing method depends on the carrier and shipment.[1] ISTA explains that its procedures apply to a specific packaged-product system, not certification of an individual material.[2] Agree any route-specific testing separately; appearance alone does not demonstrate protection.
Send item dimensions and filled weights, the number of units in each set, intended layout, outer box size if known, expected order quantity per design and delivery country. Identify label or finish sensitivities and provide representative products or drawings. Ask whether the quote includes the divider, assembly, samples, tooling, export packing and freight, and compare the same scope between suppliers. See the sampling process guide for approval steps.
From guide to product
Explore the opening, material and insert details for each design. These are options to review, not proof of a tested fit for your product.
Rigid gift boxes · Magnetic book box
Fine linen-textured wrapping paper
View structure & details →
Rigid gift boxes · Collapsible magnetic rigid box
Satin-finish printed paper
View structure & details →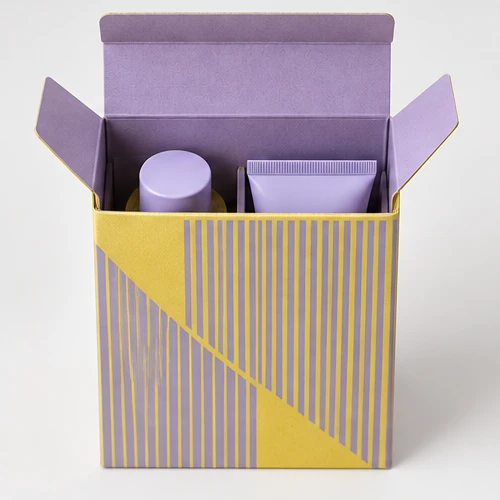
Folding cartons · Crash-lock bottom carton
Uncoated kraft paperboard
View structure & details →Payment Options
Available for confirmed production orders.
Available for eligible payments.
Available payment methods may depend on order value, project stage and transaction arrangements confirmed with MTT Packaging.
 Bank Transfer
 PayPal