Ribbon Lid Stays for Hinged Gift Boxes: What to Check on a Sample
Quick answer
A lid stay affects the opening path, presentation and packing operation. Decide the desired access, attachment position and folding path, then review the loaded box with the actual ribbon and lid materials. The correct arrangement depends on the lid and use; a picture is not a tested specification.
By Hugo He · Custom Packaging Consultant, MTT Packaging · Updated 2026-11-19
Packaging design reference. Final fit, materials and finish are confirmed on an approved sample.
At a glance
A lid stay affects the opening path, presentation and packing operation. Decide the desired access, attachment position and folding path, then review the loaded box with the actual ribbon and lid materials. The correct arrangement depends on the lid and use; a picture is not a tested specification.
A buyer can receive a sample that looks correct in a photograph but leaves the ribbon resting across the insert when closed. Another layout may open well on a display table but require a packer to hold the lid during loading. Treat these as different review questions; they are illustrative scenarios.
Record the intended opening, position of the box when used, access required above the contents and whether the ribbon is decorative or also intended to limit travel. Ask how the lid is supported during packing. Do not assume a single stay location, ribbon length or opening angle is appropriate for every lid.
02
Inspect attachment and folding paths
On the proposed sample, identify both attachment positions and whether they interfere with the wrap, hinge or insert. Open and close by the normal user path and observe where the ribbon folds. Check for trapping at the hinge, rubbing on a decorated surface or interference with a product.
Review with lid, insert, tissue and contents together. A ribbon that clears an empty box may sit against a tall cap after loading. If a change to the lid or liner shifts the attachment, mark the new drawing revision and repeat the fit review.
03
Agree acceptance rather than promise a universal life
The project team should define the handling sequence and any durability requirements with the supplier or test laboratory. Record the sample build, lid material, attachment method and observed results. Do not advertise a cycle count or safe load until a suitable documented test supports it.
Holmen explains that conversion settings depend on the specific board and tool configuration; while a wrapped rigid-box hinge is a different construction, this supports using an appropriate physical sample rather than a universal fold setting.[1]
04
Include the stay in the quote and packing brief
Request a description of ribbon material, colour, attachment, lid/liner construction, sample and tooling scope, and whether the assembly arrives ready to fill. Check whether the stay is included in all compared quotations.
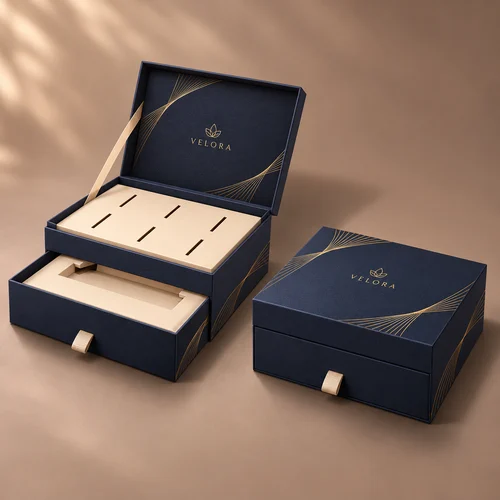
See the hinged lid and drawer concept and send lid dimensions, contents, target opening use and artwork. MTT can discuss a custom sample from 1,000 pieces per design.
05
Decision table: record the next action
Buyer decision record
Review point
What may go wrong
Next decision
Open
Ribbon prevents access or lid travel
Compare attachment position and required access; review both attachment points.
Close
Ribbon crosses the product or is trapped in the hinge
Trace the folding path with all contents present.
Handling
Attachment loosens or rubs a printed area during review
Document material, attachment, sample revision and agreed checks.
Change
Liner or lid size changes after visual approval
Review the updated assembly rather than transferring the old result.
Use this as a discussion framework, not as a claim that the pictured concept has been manufactured or passed a test. Keep the actual sample, contents and revision together when comparing changes.

 Bank Transfer
 PayPal