In this guide · 4 sections
- Start with the object, including its wrapping
- Separate product retention from insert retention
- Test the opening sequence
- Explore the structure
109 / Shaped Packaging
Quick answer
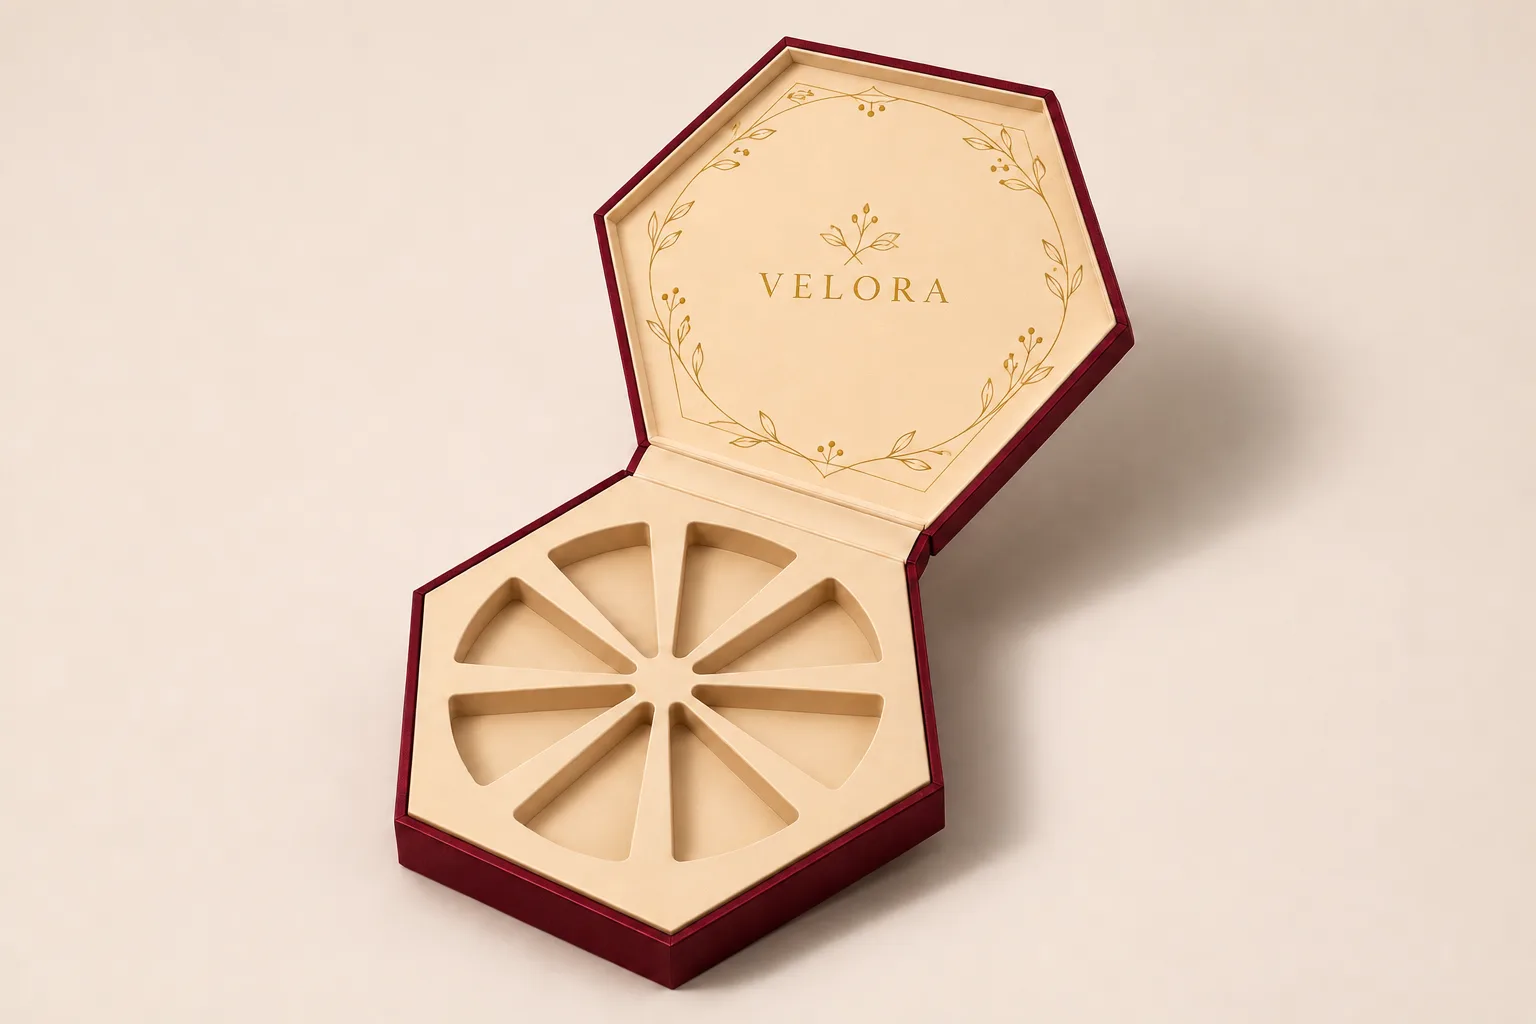
You have selected a six-sided presentation box and want customers to see a ring of individually presented pieces when they lift the cover. The next decision is the insert, not the exterior print: the layout must accommodate the largest actual wrapped item, leave a way to remove it and remain clear of the lid when the box closes. Treat the reference drawing as a starting shape; approve the final number and position of recesses against a physical sample.
 By Hugo He · Custom Packaging Consultant, MTT Packaging · Updated 2026-11-18
At a glance
Check the largest wrapped item against the narrow end of each radial compartment. On a loaded sample, check finger access and clearance under the hinged lid.
Measure the maximum length, width and thickness of each packed item. Include the seam or twist of an individual wrapper, any label, and the way the item will enter its recess. For an assortment, compare every shape in the range rather than assuming that pieces with equal net weight have equal envelopes. Provide the supplier with a position map and an extra set of actual packed pieces for fitting.
Radial compartments converge toward the center. That creates a narrow tip even when the outside edge looks generous. Ask for a section and plan showing the usable area of each recess, the bridge between adjacent recesses and the room required for fingers to grip the item. A recess that fits an item when pushed straight down may make it hard to lift out again.
The insert has to locate the items, while the box has to locate the insert. These are separate questions. Confirm whether the insert rests on the base, has a supporting layer beneath it or needs a finger notch to be removed. Ensure the insert does not ride into the hinge when the lid closes. Paperboard, wrapped board or other proposed supports should be reviewed with the actual item and finish; the reference image does not establish a material or thickness.
For a food gift, identify whether the pieces are individually wrapped and whether any packaging surface contacts food. Ask the appropriate supplier to document the material for the intended contact and destination; do not assume a decorative gift box or an unverified material is suitable for direct contact.
Place the full assortment in a representative sample, close the lid and reopen it in the way a customer would. Record whether the lid clears the product, the cover aligns with the base, and each item can be lifted out without disturbing its neighbours. If the closing system includes magnets, tabs or ribbons, verify their location on the sample rather than assuming they are present in the reference. Check the complete shipping pack for the intended distribution route; ISTA describes different packaged-product procedure families.
Brief for MTT: provide the largest wrapped item, item count and position map, target dimensions, color and logo artwork, quantity per design and shipping destination. Custom briefs start at 1,000 boxes per design; construction and fit are confirmed through sampling.
Review the packaging concept and send the actual contents and specification for a sample review. Images illustrate concepts, not completed projects.
From guide to product
Explore the opening, material and insert details for each design. These are options to review, not proof of a tested fit for your product.
Rigid gift boxes · Book-style hinged box
Custom paper wrap; color confirmed by sample
View structure & details →
Rigid gift boxes · Separate lift-off lid
Custom paper wrap; color confirmed by sample
View structure & details →
Rigid gift boxes · Hexagonal lift-off box
Textured dyed wrapping paper
View structure & details →Payment Options
Available for confirmed production orders.
Available for eligible payments.
Available payment methods may depend on order value, project stage and transaction arrangements confirmed with MTT Packaging.
 Bank Transfer
 PayPal