Earring Card in a Gift Box: Protect Posts and Make Removal Easy
Quick answer
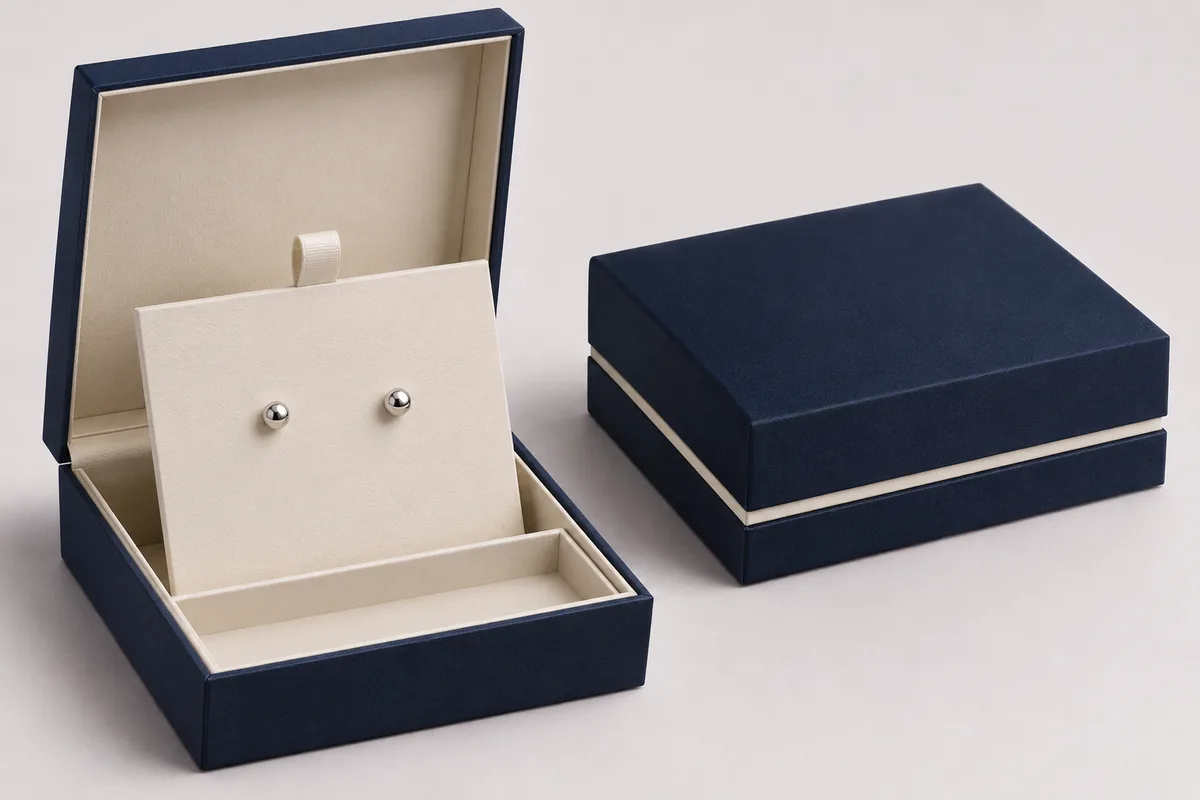
A card can make earrings easy to see, but the posts and backs need space behind it. Before approving the box, measure the complete earrings with their fastenings and decide how the customer will remove the card. Check the loaded sample, closed lid and outer shipping pack with the actual jewellery.
By Hugo He · Custom Packaging Consultant, MTT Packaging · Updated 2026-11-18
Packaging design reference. Final fit, materials and finish are confirmed on an approved sample.
At a glance
Plan the earring card, post clearance and customer removal before approving a presentation box.
Ask for the largest finished pair, including the post, backing, decorative element and any protective sleeve. Record the post projection behind the display face, the overall width of the pair and the parts that should not touch paper or adhesive. If several earring styles share a card, compare each backing as well as the decorative front.
A post that fits the card hole may still press against the box floor when the card is loaded. Draw the card position and the free space behind it on the section view, then review the actual assembly. A photograph or nominal card size cannot establish that clearance.
02
Separate card retention from earring retention
Decide how the card is held in the box and how the earrings are fixed to the card. A slot, ledge or folded support may retain the card, but it must also leave a safe path for the posts and backs. Ask the jewellery supplier which surfaces may contact the support and how the piece should be handled.
Illustrative scenario: the same card holds studs with two different backs. The decorative fronts are equal, but one backing projects farther. Approving only the smaller backing may leave insufficient space on the second version. This is an example, not an MTT order or test result.
03
Make removal and lid clearance observable
Try removing and replacing the card without pulling on either earring. A finger recess or tab may help; make sure the tab does not trap the lid or cover the jewellery. Close the box with the proposed tissue, care card and all fastenings present. Look for contact marks on the card and lid, and record the agreed card orientation.
Compare the necklace chain management guide for a different jewellery-removal problem; necklace slots do not automatically solve stud-post clearance.
04
Review the complete set and quote
The earring card box is an illustrative design reference. Ask the supplier to quote box, card, optional pouch and bag, samples, tooling and freight as separate items. If the jewellery travels by carrier, discuss the complete outer pack and suitable test scope with the brand and laboratory. ISTA distinguishes product-and-pack testing procedures according to the relevant distribution situation.[1]
05
What to send MTT
Send the actual earring dimensions and back type, photos, required card orientation, quantity per design, logo artwork and destination. MTT can review a custom packaging brief from 1,000 boxes per design; final structure, colours and branding are confirmed by sample.
06
Record a useful sample decision
At the sample review, place the loaded card into the box in the agreed orientation. Record the space behind the deepest backing, the tab or recess used for removal and whether the earrings remain seated during ordinary handling. A different backing can change the result even when the visible earring is unchanged.
Earring-card sample record
Check
Record with the sample
Card retention
Support type, insertion direction and artwork revision
Post and back
Actual backing type and clearance observation
Removal
Where the customer grips and any contact with the jewellery
Closed pack
All tissue, card and lid components present during review
Define acceptable marks and movement with the brand; the table is a review framework, not a laboratory test.

 Bank Transfer
 PayPal