A Candle Gift Box With a Wick Tool: Plan the Accessory Channel
Quick answer
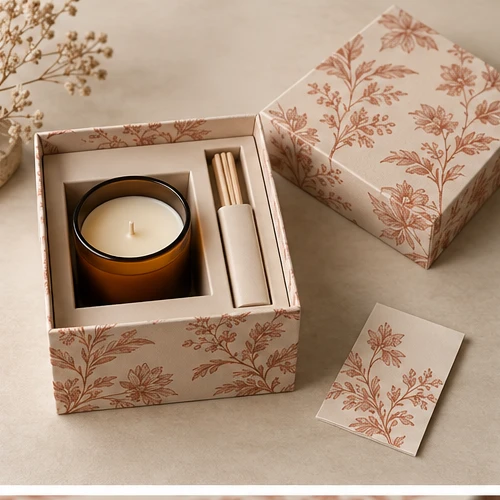
Measure the complete tool in its packed condition, including loops, hinges, sleeves or a protective cover. Note any surface that can scratch glass, ink or foil. Confirm which party supplies and packs the tool. A rendered accessory illustrates a possible layout; the customer’s actual object controls the recess.
By Hugo He · Custom Packaging Consultant, MTT Packaging · Updated 2026-11-22
Packaging design reference. Final fit, materials and finish are confirmed on an approved sample.
At a glance
Plan a protected channel for a candle accessory, check tool clearance and agree the packing sequence before approving a gift box sample.
Define the accessory, including sharp and moving parts
Measure the complete tool in its packed condition, including loops, hinges, sleeves or a protective cover. Note any surface that can scratch glass, ink or foil. Confirm which party supplies and packs the tool. A rendered accessory illustrates a possible layout; the customer’s actual object controls the recess.
02
Choose a removal sequence before die-cutting
If the customer must remove the tool before the candle, make its grip visible and accessible without levering against the jar. Compare a dedicated paperboard pocket, strap or separate wrapped compartment using the actual part. The chosen retention must allow removal without trapping a finger or dropping the accessory into the presentation box.
03
Keep hard edges apart
Place a physical boundary between a metal component and glass or labelled surfaces. Check both the position at rest and the positions it can reach if the assembled box is turned. If a protective sleeve is proposed, include it in the cavity dimensions and the packing instructions; a loose sleeve may migrate during handling.
04
Record the sample, not a universal tolerance
Mark the actual tool revision, tray material, folds, adhesive areas and sample version. Inspect the contact points after the supplier and buyer agree representative handling conditions. A simple observation on one sample is not a certified transport result. Review the full distribution pack and whether a changed tool, material or route requires new testing: ISTA retesting guidance.
05
Ask for a useful quote
Supply the tool drawing and physical sample, filled candle dimensions and weight, approved artwork, quantities and destination. Ask for accessory packing, any protective sleeve, insert and shell as distinct scope items. MTT can assess the packaging brief; projects start at 1,000 pieces per design and US$2,000 product value per order, excluding freight, sample and other fees.
06
Compare retention options
A paperboard pocket conceals the tool and can protect a neighbouring jar, but its opening must allow access. A strap makes the object visible but requires an attachment that cannot pull through the tray in normal handling. A separate wrapped compartment adds a packing step and must have space for the wrapping. Compare all three with the same actual accessory and record the packing sequence before selecting one.
07
Plan replenishment and artwork
If the tool is sourced separately, a revision in its supplier, finish or protective sleeve can affect the fit. Name the approved reference and surface condition in the packing sheet. Keep the tool’s narrow compartment clear of artwork essential to the recipient if the object will cover it. A packing proof should show which side faces up and where any safety sleeve is placed.


 Bank Transfer
 PayPal