Face Cream Jar Shoulder-Neck Box: Lid Fit and Jar Removal
Quick answer
We start a face cream presentation box by placing the filled jar in the proposed insert and lifting it back out. A shoulder-neck box adds another decision: its separate lid must fit over the raised inner neck without trapping the jar or making the box difficult to open. We would review the closed sample, jar access and outer shipping pack together before releasing the design.
By Hugo He · Custom Packaging Consultant, MTT Packaging · Updated 2026-11-16
Packaging design reference. Final fit, materials and finish are confirmed on an approved sample.
At a glance
Plan a cream jar shoulder-neck gift box around the lid, raised neck, insert and customer removal.
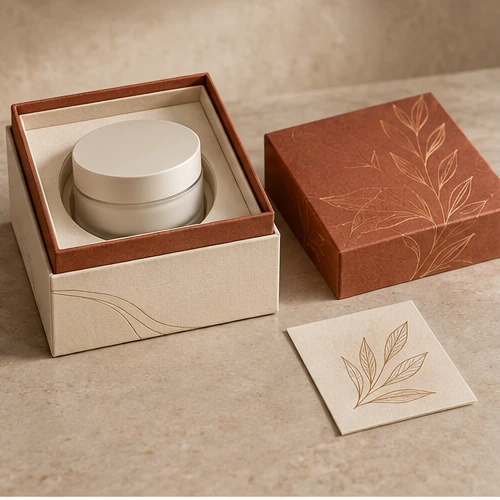
A shoulder-neck structure has a base, an inner neck rising above it, and a separate lid that locates around the neck. The visible shoulder band and depth of lid overlap are appearance decisions as well as fit decisions. Ask the converter to show the neck height, lid depth, board and wrap on a dimensioned drawing; a photograph alone does not establish these measurements.
The face cream jar shoulder-neck box is a design reference with a centred jar position. Its image is not a measured sample, a customer case or evidence of a passed shipping test.
02
Measure the whole jar, then draw the removal path
Measure the maximum jar diameter including the closed lid, overall height, base shape and filled weight. Identify any label seam or decorated face that should not rub. Ask the container supplier for its specified dimensional range; a single representative jar cannot establish the full production tolerance.
Now place the jar in the proposed insert. Can a finger reach the jar body, or does the raised neck obstruct it? An insert that fits tightly around the lid can force the recipient to grip or twist the product closure. Compare a finger recess, a support arrangement that exposes a safe grip area, or another agreed removal method on a physical sample.
03
Compare the lid in three conditions
Checks for a finished face cream box sample
Condition
Question
Record
Empty shell
Does the lid seat and lift smoothly on the wrapped neck?
Sample and drawing revision
Insert installed
Does the insert remain seated and clear the lid?
Insert material and position
Filled jar and card installed
Can the lid close without touching the jar or accessory?
Jar revision, clearance observations and photos
Jar removed
Can the jar be lifted without disturbing the insert?
Grip method and contact marks
Agree how much opening resistance and visible lid alignment are acceptable for the project. There is no universal overlap or clearance in this guide: finished board, wrap, assembly variation and the actual jar all matter.
04
Work through a change before approving tooling
Illustrative example: a brand selects a jar by nominal capacity and approves an attractive rendering. The final jar lid is wider than the initial reference, and the neck leaves little room for fingers. We would update the product envelope and review both the opening and the removal path on a revised sample. The example is hypothetical; it is not an MTT order or measured defect.
Check the largest permitted jar against the smallest permitted opening using the agreed component specifications. If the range is unknown, keep the insert drawing provisional rather than presenting a guessed allowance as a production tolerance. See the dimension measurement guide.
05
Separate presentation from delivery protection
The presentation insert locates the jar for opening; it does not by itself establish that a filled glass jar is protected in a courier network. Define whether the sets go to a store, a fulfilment centre or directly to customers, and ask who supplies the outer carton and cushioning. ISTA recommends identifying the actual distribution environment and agreeing product damage criteria before selecting an appropriate test.[1]
Request an itemised quotation for shell, insert, print and foil, tooling, sample and shipping. State quantities and artwork versions separately; MTT projects begin at 1,000 boxes per design.

 Bank Transfer
 PayPal